Showing posts with label hairstyles. Show all posts

Thursday, September 4, 2014

hair therapy {how-to}: lobster tail braid


the fishtail is a gorgeous variation of a braid, and {true story} i just learned how to do it!

turns out it's much easier to do than i thought...

not only that, but its the popularity is at its peak. i mean, everywhere. but with good reason: it's fabulous! but who wants to look like everyone else?

there are other ways you can create a braid that's unique and will stand out just. the same. and we're in luck as Mario Russo, owner and lead stylist of Salon Mario Russo in Boston, has shared another style with me you are sure to love. he believes it’s time for a new tail to have their chance in the spotlight. 

cue the Lobster Tail. sounds complicated, but it's not. this messy and textured twist is easy to create and doesn’t even requiring braiding skills…just twisting! depending on the occasion, the Lobster Tail can be as deconstructed or as neat as you like.

take a look...

The Lobster Tail


to begin, start with day-old hair. this will help you to achieve the messy and textured look of this braid. you can also use a texturizing spray like Oribe Dry Texturizing Spray on the roots to eliminate any natural oils that can flatten hair.


next, gather hair to one side, while leaving a few front pieces of hair out on the opposite. curl these pieces with a 1-inch barrel to add more shape around the face. separate hair in half, a front and back section, and make three small sections out of the back section. 


twist each one individually before joining all three to make one twist. secure with a clip so you can work freely on the front section. don’t worry if it untwists a little bit, you can re-twist later.


take the front section, split into two small twisted sections and then combine to make one twist.
join the front and back twists, make one complete twist and then secure with 5-6 bobby pins by ear. this will hold together the beginning of the twist.
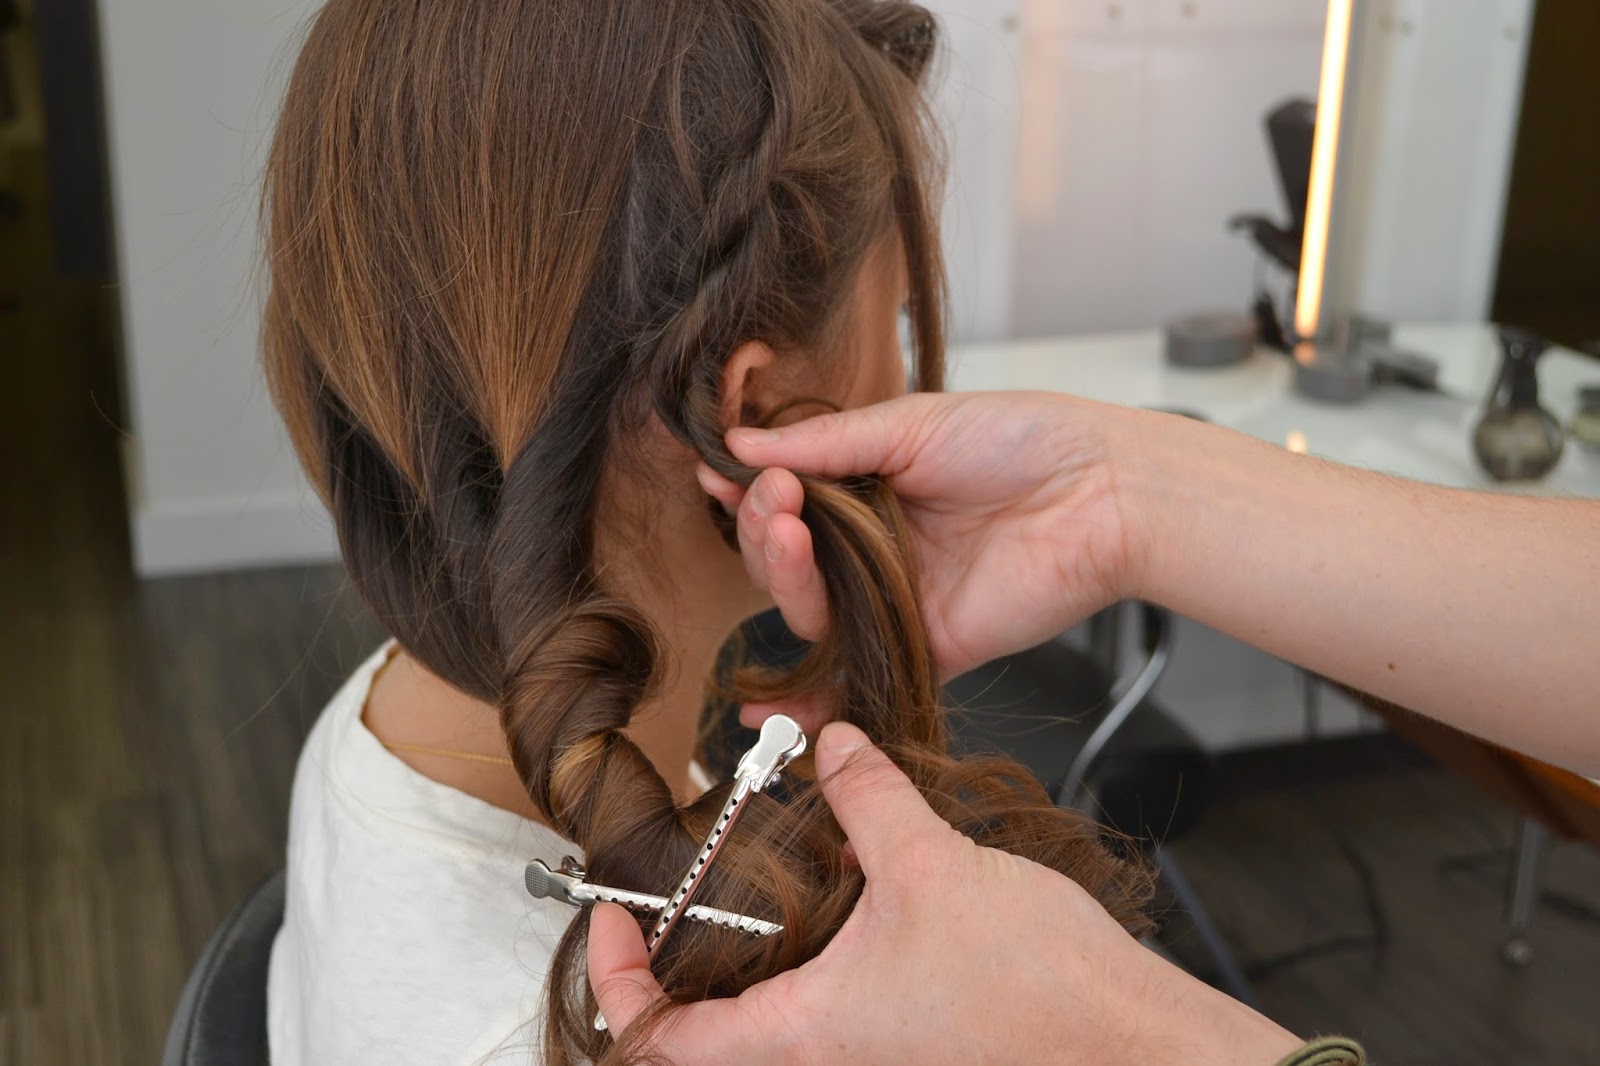


spray texturizing spray again on hair below the bobby pins to create fullness and then make two twists with this remaining hair and combine the two twists into one, twisting all the way down. don’t twist too hard; let it be a little loose to give it more thickness and texture. 


before finally securing with hair tie, put bobby pins UP throughout the twist almost like a skeleton for the twist and then secure with hair tie. the pins will hold the twist in place. finish off with a light hair spray, such as Oribe Superfine Strong Hair Spray.

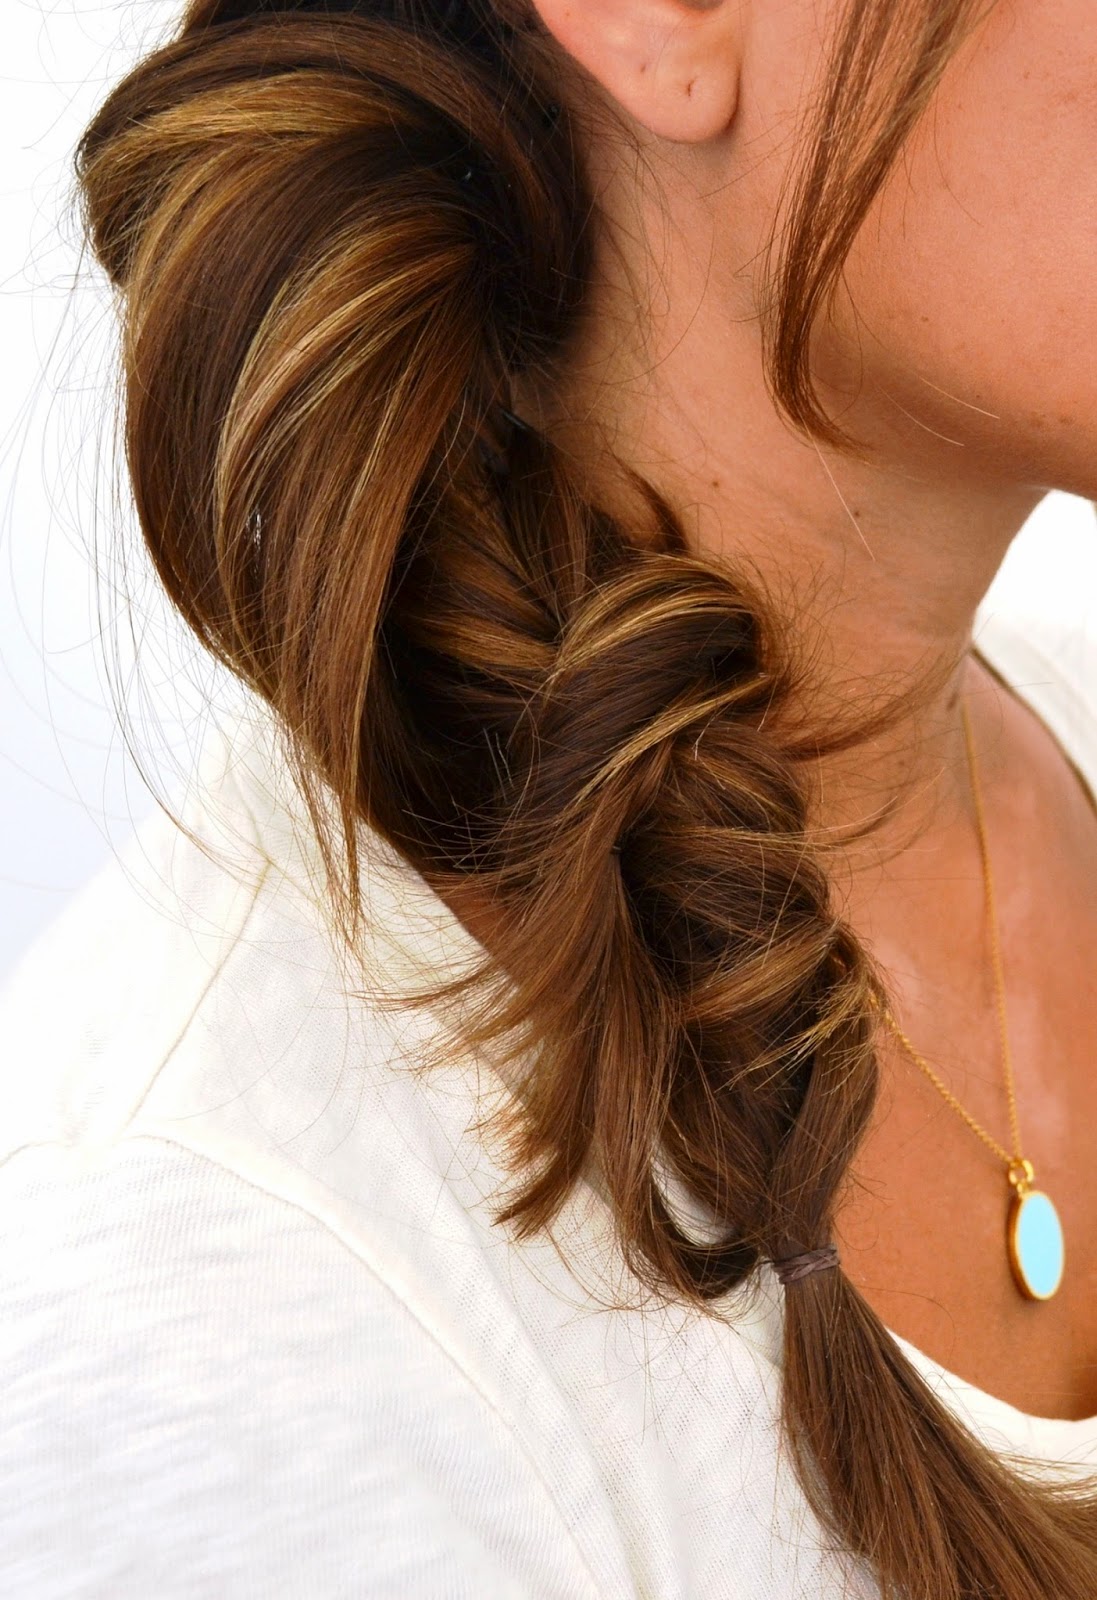


isn't this a fab style?

i think the finished braid is simply gorgeous and i'm certainly definitely inspired ~ it's so easy i have no excuse not to try it! :)

many thanks again to Mario Russo salon for the info!


info and images courtesy of Mario Russo

Wednesday, July 23, 2014

hair therapy {how-to}: Tri-look Ponytail


when it comes to the standard ponytail, it's all about being creative. celebs like Jennifer Morrison, Behati Prinsloo and Iggy Azalea have taken things to another level when it comes to the standard ponytail by adding braids, some volume, texture, sometimes a fun accessory...

of course, these ladies have the help of their personal hair gurus, but thankfully, i know the fabulous Mario Russo, owner & lead stylist of Mario Russo salon in boston. he's shared with me his take on this trend, complete with step-by-step instructions {and lots of pics!} to create a gorgeous, summer-friendly, tri-look ponytail! it's totally DIY-friendly and something you can do at home.

take a look...

1. to start, curl hair with a wide-barrel curling iron or opt for a straighter yet full pony by blow drying hair with a large round brush.


2. slightly tease hair at the top of head to give the style some height.


3. on one side of the head create anywhere from 1-3 small braids, incorporating the hair along your scalp as you braid {similar to a french braid-style, you want the braids to be against your head}; secure each braid with a clear elastic to later be pulled into the pony.


4. gather hair into pony with all of the braids in it and secure with a clear hair elastic.


5. take a piece from under your ponytail, wrap around elastic and secure with a bobby pin that matches your hair color.

6. use a rat tail comb to loosen and pull up teased portion of hair that may have been flattened when you secured the ponytail.


7. use Oribe Dry Texturizing Spray just on the ponytail to make it look fuller and more textured.

8. to hold look, use Oribe Superfine Strong Hair Spray.


love it!

 remember, don’t be afraid to get creative and have fun ~ try different braid and twist variations until you feel the style is complete and chic!

if you try this ponytail, let me know! find out more about Mario Russo and the salon at mariorusso.com; for more hair inspiration and tips, follow on twitter and Facebook!


info and images courtesy of Mario Russo salon.

Monday, May 19, 2014

hair therapy {how-to}: easy pool-to-party hairstyles

just in time for summer, senior stylist Graziella Lembo {at SalonCapri in Boston} shared with me the how-tos on 4 hairstyles she created that transition effortlessly from pool to party {or bedhead to bombshell beach babe} in just a few quick steps…

and even if you have no party plans, i think these inspired styles are fabulous for any time you might want to change up how you typically wear your hair. take a look…

Luxe Low Loop Knot:


beginning with straightened hair and a center part, spray Kerastase Double Force all over hair and smooth to create a sleek look.
work Shu Uemura Cotton Uzu through the ends of hair to creates shine and pull back hair into a low ponytail.
take a one inch section of hair and wrap around the elastic securing with a bobby pin. with remaining hair, loop up and secure with elastic. take the ends of the loop and wrap around the elastic, securing with bobby pins. finish with hairspray to create a lasting hold!


 "Bedhead-to-Beach" Faux Bob Fishtail:


using a 1 inch curling wand, take small sections of hair and create loose beachy waves
once waves have cooled ~ gently loosen by running fingers from scalp to ends.
taking the top section of hair, pull back bangs and create a cascading side fishtail braid down one side of your head.
using bobby pins, pin waves up and under to create a faux bob and secure the look with Kerastase Double Force


"Pool To Party" Wrap Bun:


the perfect style for after a dip in the pool; begin with your hair wet and create a low ponytail.
taking your favorite hair scarf, use a bobby pin to secure it to your elastic. twist your hair around the scarf and wrap hair up in a bun.
secure the look with bobby pins and finish with Kerastase Double Force to hold!


Textured & Tousled Beach Waves:


start the look with your fresh-from-the-beach waves or if you have freshly washed hair, spritz strands with a salt water solution for texture.
next, spray Kerastase Double Force throughout dry hair and create a deep side part;
on the shorter side of your part, pull back your hair and secure with a bobby pin. secure with hairspray and use a curling wand to tame any flyaway pieces.


thank you, Graziella for sharing how to create these fabulous perfect-for-summer hairstyles! be sure to look her up if you're in the boston area, SalonCapri.com. you can also find the salon on Facebook and twitter


info and images courtesy of PR representing Salon Capri

Friday, November 8, 2013

hair therapy: create a braid bun blend

buns and braided styles aren't new, but they're so versatile. they've become especially trendy, and for good reason. with so many variations  {from casual to uber-glam, think fishtail and crown braids, or messy top knots and the perfect sock bun} and creative twists, these classic styles are so fabulous right now.

Mario Russo, owner lead stylist of Salon Mario Russo in boston has shared another how-to hairstyle with me that i know you're going to love! if you're a fan of both the bun and the braid, it's time to cue the braid bun blend.

combing the two styles, this gorgeous updo is simply elegant and can be worn everywhere from brunch with friends to date night. oh, and did you notice it’s a side bun?

 take a look at the step-by-step instructions and try this new look for your locks...

step 1:
blow-dry your hair to its smoothest state using a boar bristle brush. add volume by using a product like Bumble & Bumble Thickening Hairspray.

step 2:
part your hair slightly off to the side and begin to french braid it starting from the temple of the side with less hair. continue the braid all the way around your head until you reach the spot just beneath the ear on the other side. once you've reached this point, tie the end of the braid with a clear elastic.


step 3:
take the side of the hair that has not yet been braided, and use a curling iron to curl the hair away from the face, making sure to keep the curls loose so they take on a more wavy, beachy look. for even more texture on this side, try Oribe Texturizing Spray.


 step 4:
take a few random pieces from the curled side and form a loose twist over the ear. this is the ear that's opposite the side of the head where you started your braid.

step 5:
begin to twist the curled side of your hair and the end of the braid around each other to form a very loose side bun. fasten your bun securely, but still loosely. the look should be very whimsical. finish your style with a shine-enhancing spray like MoroccanOil Luminous Hairspray.


and there you have it ~ the update on two classic styles! i love it, don't you?


images and info courtesy of Mario Russo Salon